Honey Ginger Chicken – Slow Cooker Friendly

Nita Sharda, Carrots and Cake

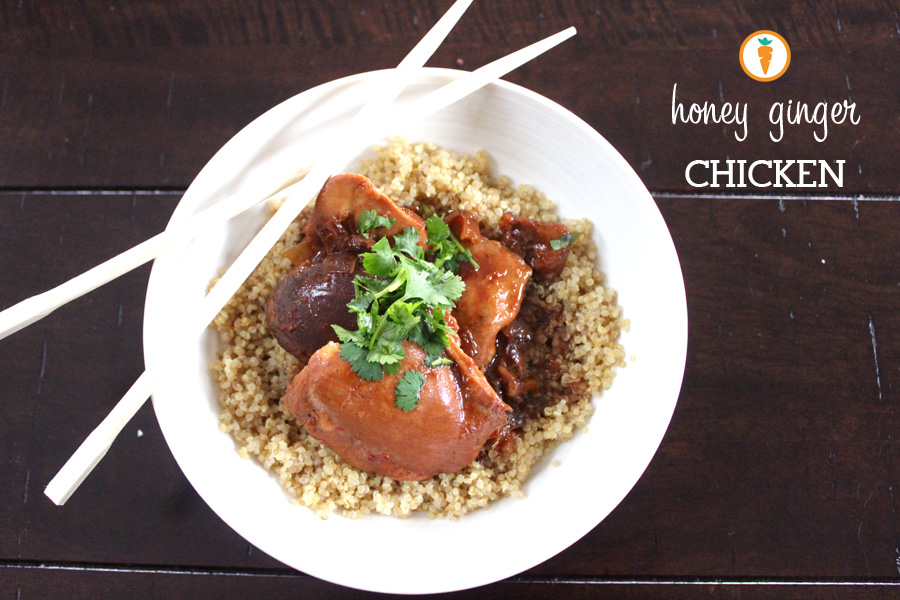
Always a crowd pleaser.

When the hubs tells me that the boys are coming over for dinner, I can always turn to this no-fail recipe! Stir up the dressing, throw in the chicken and let the slow cooker do its thing. Now that’s my kinda meal. But beyond the simplicity in preparing this dish, it’s actually insanely delicious. I was inspired by a recipe posted by fellow blogger, Foodie with Family. I adapted the recipe to suit our taste buds and we’ve never looked back.

Honey Ginger Chicken - Slow Cooker Friendly
 
Prep time
Cook time
Total time
 
Serves: 5-6
Ingredients
  • 4lb boneless skinless chicken thighs (approx 16 – 18 thighs, trim the fat)
  • Black pepper
  • ½ cup honey
  • ½ cup sodium reduced soy sauce
  • ½ cup minced onion
  • ¼ cup ketchup
  • 1 tablespoon sesame oil
  • 2 tablespoon minced ginger
  • 1 teaspoon crushed red pepper flakes
  • 4 teaspoons cornstarch
Instructions
  1. Very lightly season the chicken thighs with pepper and place them in the slow cooker.
  2. Whisk the honey, soy sauce, onion, ketchup, sesame oil, ginger and pepper flakes together in a mixing bowl and pour over the chicken thighs. Cover the slow cooker and cook on low for 4 hours, or until the chicken is tender and cooked through.
  3. Use tongs or a slotted spoon to transfer the chicken to a rimmed plate or bowl and cover lightly with foil, leaving the pan juices in the slow cooker.
  4. Stir the cornstarch into the water with a fork or small whisk until dissolved. Whisk the mixture into the pan juices in the slow cooker. Re-cover the slow-cooker and turn the heat to high. Let it cook and thicken for 15 minutes. (Note: This step is optional and most desired for a thicker sauce).
  5. Carefully transfer the chicken back into the slow-cooker.
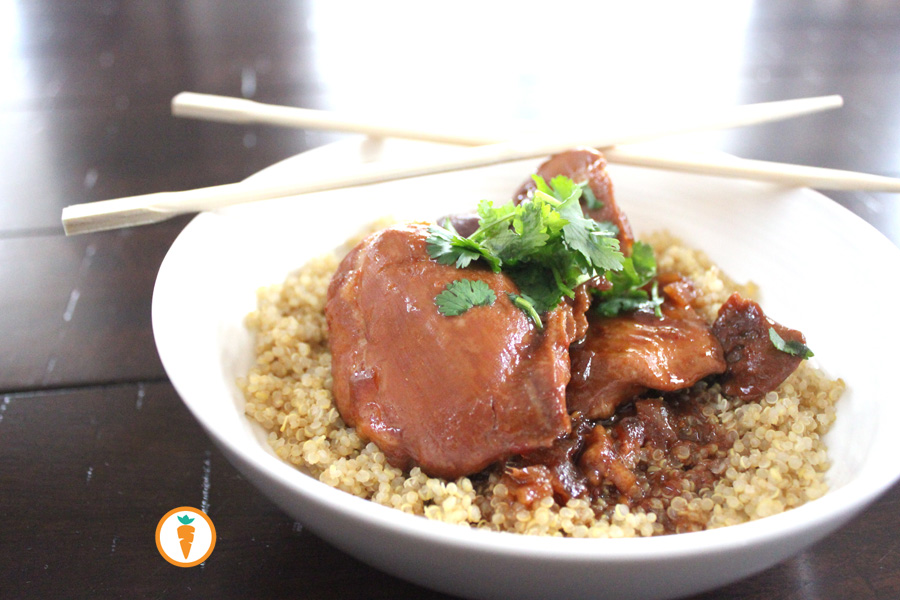
  6. Garnish with sesame seeds and cilantro. Serve!

This chicken entree pairs nicely with quinoa or even on a bed of rice. As far as veg, I like to enjoy this recipe with green beans or stir fried vegetables. Don’t forget to top with cilantro or toasted sesame seeds. Oh and it’s the kind of recipe that tastes better the next day.  L O V E.

Let me know how you’d change up the recipe, and don’t forget to leave a comment. Happy long weekend!

Nita Sharda, Carrots and Cake

            – With Love, Carrots and Cake,

Carrots and Cake Nita Sharda

Baked Oatmeal with Apple & Cinnamon

Carrots and Cake, Nita Sharda

Quick n’ easy.

Breakfast. The most important meal of the day. No, it’s not an old wives tale or a myth. It’s a fact folks. In my practice I meet a lot of clients that just can’t stomach the idea of having a meal first thing in the morning. I always explain the benefits of breakfast very briefly, but also offer new and novel ideas. Some people have just over-killed “breakfasty foods” – you know the toast, cereal, porridge, eggs and sausages, the list goes on. I get it, it gets boring. But heck, think outside the box. I don’t care if you have a sandwich for breakfast or even leftover lasagna. Just have something that is balanced (aim for 3 food groups)! If breakfast for dinner is appropriate, why can’t we have “dinner” for breakfast? Sometimes, years of eating cereal or oatmeal the traditional way can get boring.

There’s also no harm is postponing breakfast either: such as, waiting until you’ve gotten to your office or had some time to really “wake up”.

–    Breakfast. The Most important meal of the day.    –

Other clients express that their morning is often really busy and they simply “have no time”. Being a rather busy-body myself, I can fully sympathize with this one. So what do I tell people? I encourage them to prepare breakfast the night before as they would for lunch. HERE is where this recipe comes handy. It’s a staple in our home and quickly devoured.

This recipe is a version of oatmeal, but baked. You can prepare it in advance and it will offer you 4-6 servings over the week. You can feel free to munch on it as a bar, or pour warm milk over it. Sometimes I like to throw in nuts, fresh berries, coconut or even a mashed banana to change it up. The ideas are truly endless. If you’re making this to serve a large group, you can easily double the recipe and bake into a 13″ x 9″ dish. Store covered in the refrigerator for up to 4-5 days.

4.0 from 1 reviews
Baked Oatmeal with Apples & Cinnamon
 
Prep time
Cook time
Total time
 
Serves: 4-6
Ingredients
  • 1 ½ cups Old Fashioned rolled oats
  • ¼ cup sliced almonds or walnuts
  • ¼ cup dried cranberries (optional: or add in shredded coconut, raisins etc)
  • 1 Apple, chopped
  • 2 tbsp brown sugar
  • Pinch salt
  • 3 cups milk or milk alternative
  • 2 tsp Ground cinnamon
Instructions
  1. Preheat oven to 350 degrees and grease an 8" (2L) baking dish
  2. In a medium size bowl, combine oats, nuts, cranberries, chopped apple, brown sugar, cinnamon and salt.
  3. Once blended together, pour in milk. Mix well.
  4. Pour contents into the greased pan and bake until oats are softened and milk has absorbed. It usually takes about 45 - 60 minutes.
  5. Serve hot or cold.

Nita Sharda, Carrots and Cake

Nita Sharda

            – With Love, Carrots and Cake,

Carrots and Cake Nita Sharda


Spicy Honey Roasted Chickpeas

Carrots and Cake, Nita Sharda

Seasoned and roasted to perfection!

As you can likely tell from the few posts I’ve had since the birth of this blog, I’m a HUGE proponent of sourcing plant based foods as a source of protein. Where do I begin? Beans, legumes, lentils and nuts are packed with protein and heart healthy nutrients to keep your ticker in top shape!

This particular recipe for roasted chickpeas is ridiculously easy and incredibly tasty. What more do you want out of a recipe,  like really? If you’re new to beans, you can purchase them dry and boil until tender. Inspect your dried chickpeas before cooking, throwing out those that are shriveled or have broken skin. You might find some pebbles or twigs which can be discarded. For every cup of chickpeas, soak with 3 cups water. Chickpeas need to be soaked for at least four hours or preferably for 8 hours. To keep things easy, soak them overnight. Throw out the soaking water by putting chickpeas into a strainer and rinsing them well. This washes away the carbohydrates and sugars that cause gas. For more information on chickpeas, check out this article from Eat Right Ontario.

Or, you can easily find canned versions. If you’re going this route, be sure to rinse them thoroughly. Either way, ensure you allow enough time for the chickpeas to completely dry out, otherwise they may not roast nicely for this recipe.

I typically stash these in an airtight container in the fridge and nibble on the chickpeas a little bit at a time. Another way to enjoy this recipe is by tossing them onto a salad. They offer an added “kick” to any salad and a pretty awesome crunch.

5.0 from 1 reviews
Spicy Honey Roasted Chickpeas
 
Prep time
Cook time
Total time
 
Ingredients
  • 1 28oz can chickpeas
  • 2 Tbsp canola oil
  • 2 tsp cumin
  • 2 tsp paprika
  • 1 tsp garlic powder
  • Pinch of black pepper
  • 1 Tbsp honey (or agave nectar)
Instructions
  1. Preheat oven to 350 degrees.
  2. Drain, rinse and dry the chickpeas. You can also use a salad spinner to help them dry a bit faster.
  3. Mix the cumin, paprika, garlic powder and black pepper into the oil. Stir honey into this mixture.
  4. Toss this dressing onto the chickpeas until evenly coated.
  5. Spread the chickpeas in an even layer on a rimmed baking sheet and bake until crisp, about 30 to 40 minutes. Check up on your chickpeas every 10 minutes and roll them around with a spatula.
  6. And, enjoy!


Carrots and Cake, Nita ShardaCarrots and Cake, Nita Sharda

            – With Love, Carrots and Cake,

Carrots and Cake Nita Sharda

Smashin’ Potatoes


Smashed potatoes topped with Jalapeno Monterey Jack cheese

I’ve mentioned in a previous post, in our home we are not carb-phobics (intense fear of carbohydrates). Instead, we fully embrace carbohydrates as the primary source of energy for our body and brain.  In my practice I help misinformed clients understand the role of carbohydrates in a healthy diet and often spend time educating them on the wonderful benefits carbs offer. Typical carb foods can be rich in fibre, folate and iron.  You may even be surprised to know that 45 to 65 per cent of your daily calories should be coming from carbohydrate sources, especially if you’re an active person!

…we fully embrace carbohydrates as the primary source of energy for our body and brain…

Growing up, my primary “carb food” came in the form of an Indian flatbread known as roti. Other families may rely on rice, bread or potatoes as their main “carb” source. After living independently and being able to experiment in my own kitchen, I often gravitate towards whole grain breads, white and sweet potatoes, brown rice, soba noodles and whole grain pasta.

Onto the important stuff.

Here’s an easy peasy take on baby potatoes. Being a cheese lover, I decided to top these babies with Manitoba proud, Bothwell Cheese…the Cadillac of all cheeses (in my opinion).

Smash (gently) prior to baking.

Remember, purchasing local foods helps to sustain our economy and flourish our communities.

Smashin' Potatoes
 
Prep time
Cook time
Total time
 
Serves: 3-4
Ingredients
  • 1lb Baby Potatoes
  • 2 tsp Canola Oil
  • 1 tbsp salt free seasoning (Greek, Italian, plain parsley etc)
  • Dash of cracked black pepper
  • ⅓ cup grated cheese (optional, use dairy free if vegan)
Instructions
  1. Bring pot of water to boil. Add in potatoes, and cook until fork tender.
  2. Drain water from the potatoes and line on a baking sheet that has been drizzled with the oil.
  3. Preheat oven to 350 degrees.
  4. Smash each potato using a potato masher, your hand or even a fork.
  5. Bake for 15 minutes. Top with cheese, bake for another 2 minutes.

        – With Love, Carrots and Cake,

Carrots and Cake Nita Sharda

Black Bean & Corn Enchiladas

More than any other type of cuisine, I must admit I adore Mexican inspired dishes. Perhaps in a previous life I was a Latin woman or this may all be thanks to a dear friend of mine, who happens to be part Mexican. Either way, it’s a win win situation.

I first discovered this recipe in the coveted Dietitians of Canada Cook! cookbook. I love that it’s a meatless dish and nicely pairs black beans and cheese, without it being too heavy.
Give the recipe a try and don’t forget to leave a comment!

Espero que tengas un buen día.

Carrots and Cake Nita Sharda
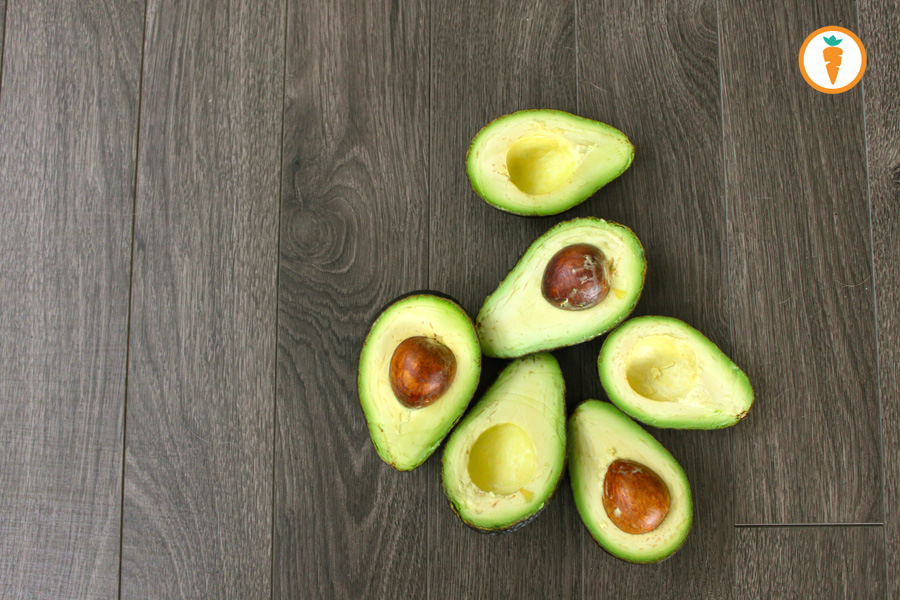
I paired this dish with a simple guacamole and a side of corn tortilla chips proudly made in Manitoba (courtesy of La Cocina Foods). When time permits, it’s also very nice with a fresh salsa and chopped cilantro.

5.0 from 1 reviews
Black Bean & Corn Enchiladas
 
Prep time
Cook time
Total time
 
Serves: 5 - 6
Ingredients
  • 1 tsp canola oil
  • 1 ½ cups chopped red bell peppers
  • 1 cup chopped onion
  • 2 cloves garlic, minced
  • 2 plum tomatoes, coarsely chopped
  • 1 can (19 oz) black beans, drained and rinsed
  • ½ cup thawed frozen corn kernels
  • 1 tsp chili powder
  • ¼ tsp freshly group black pepper
  • 8 8" whole wheat flour tortillas
  • 2 tbsp butter
  • 2 tbsp all-purpose flour
  • 1 cup vegetable broth
  • ½ cup light sour cream
  • 1 cup shredded Monterey Jack or Cheddar cheese
Instructions
  1. In a nonstick skillet, heat oil over medium heat. Saute red peppers and onion for 4 to 5 minutes or until softened. Add garlic and sauté for 30 seconds. Stir in tomatoes, beans, corn, chili powder and pepper.
  2. Divide bean mixture evenly among tortillas. Roll up burrito-style and place seam side down in prepared baking dish. Set aside.
  3. Preheat oven to 350 degrees.
  4. In a small saucepan, melt butter over medium heat. Whisk in flour and sauté for 30 seconds. Gradually whisk in broth and bring to a boil, whisking the entire time until thick—about 2 – 3 minutes. Remove from heat and stir in sour cream. Pour sauce over tortillas and sprinkle with cheese.
  5. Bake in preheated oven for 20 minutes or until cheese is melted and sauce is bubbling.

Carrots and Cake Nita Sharda

Just drizzle…

Carrots and Cake Nita Sharda

Never, ever, ever forget about the guacamole.


       – With Love, Carrots and Cake,

Carrots and Cake Nita Sharda

Chocolate Avocado Mousse

Smooth, creamy and chocolatey.

This is the kind of dessert that makes you feel good as you’re eating it. It also happens to be dairy-free, gluten-free and isn’t chalk full of refined sugar. Now let me warn you, if you’re expecting this to taste like our traditional Jell-O brand chocolate puddings, you need to know it doesn’t. This take on a chocolate mousse plays on the flavor and texture of the avocado–creating a dessert that is smooth and creamy. But heck, who care about all that when it has chocolate in it!

Don’t be alarmed by the addition of soy sauce as an ingredient. It helps to mask the taste of the avocado and enhances the flavor of the cocoa powder. I prommmise. 

Go on, enjoy. 

Carrots and Cake

Chocolate Avocado Mousse
 
Prep time
Total time
 
Serves: 4 - 5
Ingredients
  • 2 ripe avocados
  • 6 tbsp unsweetened raw cocoa powder
  • 5 tbsp maple syrup or agave nectar
  • ¼ cup milk (or water, or an alternative milk substitute)
  • 1 tsp vanilla
  • 1 tsp reduced sodium soy sauce (if Gluten Free source GF soy sauce)
  • Fresh fruit for garnish
Instructions
  1. Place all the ingredients in the bowl of an electric food processor.
  2. Process until mixture is smooth. If the pudding is too thick, feel free to add more liquid.
  3. Garnish with desired fruit such as raspberries, kiwi or mango!

Signature2

Pumpkin Pecan Muffins

Carrots and Cake Nita Sharda

We all know pumpkins are seasonal in the fall, but when you’re craving that rich flavor with hints of cinnamon, it’s hard to resist baking a batch of muffins that feature this squash. These Pumpkin Pecan Muffins are moist and taste best when served fresh. Don’t be alarmed by the ratio of whole wheat flour to all purpose flour. The muffins don’t come out dense; instead, they are light and fluffy. If you’re whipping up a batch of these feel free to add in dried cranberries instead or even a handful of dark chocolate chips. Have fun with it, and own it!

Oh and a tip…

Sour milk can be used instead of buttermilk. To prepare, combine 2 tsp (10 mL) lemon juice or vinegar with 1 cup (250 mL) milk and let stand for 5 minutes. See, I gotchu’ covered. And what’s even better? These muffins freeze really well, SO double up! 

Recipe was adapted from this Pumpkin Raisin Muffin.

5.0 from 1 reviews
Pumpkin Pecan Muffins
 
Prep time
Cook time
Total time
 
Serves: as many or as few as you'd like
Ingredients
  • 1 cup whole-wheat flour
  • ¾ cup all-purpose flour
  • ½ cup granulated sugar
  • 2 tsp baking powder
  • ½ tsp baking soda
  • ½ tbsp ground cinnamon
  • ½ tsp ground nutmeg
  • ¼ tsp ground ginger
  • ¼ tsp salt
  • ½ cup raisins
  • ½ cup chopped pecans or walnuts
  • ½ can (7 oz/200 mL) pumpkin purée (not pie filling)
  • ¼ cup vegetable oil
  • 1 cup buttermilk or sour milk (see tip below)
  • 2 eggs
Instructions
  1. Preheat oven to 375 degrees.
  2. In a large bowl, combine whole-wheat flour, all-purpose flour, sugar, baking powder, baking soda, cinnamon, nutmeg, ginger, salt and raisins
  3. In a separate bowl, blend together pumpkin, oil, buttermilk and eggs.
  4. Make a large well in center of dry ingredients; pour in wet ingredients all at once. Gently fold together until just combined.
  5. Spoon batter into muffin tins. Sprinkle each muffin lightly with brown sugar.
  6. Bake in preheated oven for 20-25 minutes or until firm to the touch.

Nita Sharda, Carrots and Cake

Nita Sharda, Carrots and Cake

Yeah, that’s real butter.

Recipe adapted from Dietitian’s of Canada website:
http://www.dietitians.ca/Recipes/Pumpkin-Raisin-Muffins.aspx

Carrots and Cake Nita Sharda

Energy Date Balls

Energy Date Balls

These delectable balls are power packed with amazing micronutrients, healthy fats and a ton of flavor. What I love about them is their versatility. It’s easy to pack up and munch on these gems when life is throwing you a few curve balls and time is of the essence. What’s even better? You don’t gotta bake ‘em! These energy balls remind me to never judge a book by it’s cover—though are small in size, they are packed with power. About 2 – 3 of these will keep you full and offer you the opportunity to snack on something sweet without sacrificing nutrition.

Get ballin’!

Energy Date Balls
 
Prep time
Total time
 
Ingredients
  • 1 cup raw almonds, pecans or walnuts
  • 16 dates, pitted
  • Water, for blending (1 – 2 tbsp)
  • ½ cup shredded unsweetened coconut
  • ⅓ cup almond butter
  • 3 tbsp good quality cocoa powder
  • 1 tsp ground cinnamon
Instructions
  1. Pulse almonds in a food processor until coarsely ground. Transfer to a bowl.
  2. Pulse dates in food processor until almost smooth, adding up to 3 tbsp (45 mL) water as needed to help blend.
  3. Add almonds back to food processor with coconut, almond butter, cocoa powder and cinnamon and pulse, scraping down mixture in bowl with a wooden spoon as needed until completely incorporated.
  4. Transfer to a large bowl. Scoop mixture into 2tbsp balls, rolling with your hands; place balls on a parchment-lined baking sheet. Cover and refrigerate.
  5. Makes 18 balls

Recipe adapted from http://naturaldelights.ca/MedjoolDatePowerBalls.html

Energy Date Balls

Perfect on-the-go snack!

Signature2


Truly Tabbouleh

Tabbouleh_main

I think I’ve come pretty close. I wish you could smell it looking at the photo.

It was all thanks to the Shop & Save book that enticed us to take a trip down to Winnipeg’s Exchange District to enjoy some eats from Shawarma Khan. Here we enjoyed their infamous lamb shawarma, a delish chickpea salad and tabbouleh. Everything served was delectable and certainly worth our dollar. The tabbouleh got me—it was the perfect mixture of fresh, flavor and zing. I came home anxious to try my hand at replicating the recipe.

Truly Tabbouleh
 
Prep time
Cook time
Total time
 
Serves: 5-6
Ingredients
  • ½ bulgur wheat
  • 1 cup boiling water
  • 2 bunches flat-leaf parsley
  • 1 bunch mint (approx ⅓ cup)
  • 2 roma tomatoes, finely chopped
  • 1 large cucumber, peeled and finely diced
  • 3 green onions, thinly sliced
  • 4 Tbsp Olive Oil
  • Juice of ½ lemon
  • Salt and Pepper to taste
Instructions
  1. Pour the boiling water over the bulgur wheat in a shallow bowl. Use a fork to quickly stir the water into the wheat, then set aside for 10 minutes.
  2. Fluff the wheat with a fork, then place lid over the bowl and set on the countertop.
  3. Wash the leaves of parsley and mint. Dry completely and then finely chop up your herbs. Combine with the tomatoes, cucumber, green onion and bulgur.
  4. Drizzle olive oil, lemon juice and add in salt and pepper, to taste.

Tip: This salad is great when paired with a soup, pita or kabobs. It lasts in your fridge for 3 days
Tabbouleh_ingredients

Tasty and fresh!

The salad itself will last in your fridge several days—it almost tastes infinitely better the following day once the flavors have had some time to meddle. For those of you that haven’t experimented with bulgur—it’s a form of a whole wheat grain that has been dried and cracked. It can be used as porridge, in baking or as a side dish.

Tabbouleh finishedSignature2

Confetti Quinoa Salad

Quinoa_main

When we’re stuck dead center in a Winnipeg winter—what do we do? How about make colorful summery salads? This quinoa salad won my heart over. I’m a pesto fanatic so I was happy when the Fresh Juice magazine featured a quinoa recipe that was all dressed in a basil dressing and could be assembled with minimal cooking. I’ve adapted the recipe a bit from the original (which, I couldn’t seem to find online)!

4.5 from 2 reviews
Confetti Quinoa Salad
 
Prep time
Cook time
Total time
 
Author:
Recipe type: Salad
Serves: 8
Ingredients
  • 1 cup quinoa
  • 2 cups water
  • 1 yellow pepper, diced
  • 1 red pepper, diced (optional, great especially if you want to increase your veggie intake)
  • 1 cup diced English cucumber
  • ⅓ cup chopped red onion
  • 1 can (19 oz) no-salt-added chickpeas, drained and rinsed
  • ⅓ cup crumbled feta cheese
  • ½ cup cherry tomatoes, halved
  • Toasted pine nuts for garnish (optional)
  • Dressing:
  • 2 tbsp prepared pesto (I love the Classico Pesto)
  • 2 tbsp white wine vinegar
  • 2 tbsp olive oil
  • ¼ tsp black pepper
Instructions
  1. In saucepan, add quinoa and water (if quinoa isn't pre-rinsed, first rinse and drain well). Bring to a boil; reduce heat, cover and simmer for 18 to 20 minutes or until all liquid has been absorbed. Remove from heat and let stand for 5 minutes. Fluff with fork; transfer to large bowl. Let cool for 15 minutes.
  2. Meanwhile, for the dressing, whisk together pesto, vinegar, oil and pepper.
  3. Add to quinoa with yellow pepper, cucumber, onion and chickpeas; toss gently to coat. Fold in feta and tomatoes. Sprinkle with pine nuts, if desired.
  4. Substitutions/Tips
  5. Feel free to add in other veggies you may enjoy, or sun dried tomatoes for additional flavor.
  6. This recipe makes a large batch so you may want to cut the ingredients in half if you’re just feeding yourself or a small group.

Substitutions/Tips

Feel free to add in other veggies you may enjoy, or sun dried tomatoes for additional flavor.
This recipe makes a large batch so you may want to cut the ingredients in half if you’re just feeding yourself or a small group.

Quinoa_ingredients

Look at the array of colors—pretty, huh?

Quinoa; it’s an ancient grain that seems to be all the talk as of lately, and with good reasons. It boasts itself as a great source of protein, making it worthwhile for vegetarians to incorporate into their lifestyle. And, for those with a gluten sensitivity, it’s a dream come true. Quinoa can be purchased in different forms—whole grain or as ground flour. You’ll even find them offered in an array of colors: white, black, red—but really, they’re all the same. We typically consume quinoa 2-3x week as a hearty salad like this one, as a side or in the form of patties. How do you enjoy your quinoa? Let me know, in the mean time give this recipe a try.

Signature2